
Howdy!
You are a shining owner of a regular license based on Flamingo Portfolio Theme
This file will help you to start working with your new Portfolio Wordpress Theme. First steps installing, guides to create your own pages, portfolio views or any other feature included.
In case you could have any doubt about some detail explained here or any other just create a support ticket, we will try to help as better as possible. Support Forum →
Notice
Please, before asking for help, make sure you are using the last theme´s version.
First steps
Let´s start!
The first point we must to talk is about how to install any Wordpress Theme. Some time ago we created a screencast based in other of our themes, Folio Two. Here you will see closer how to install the zip included within your Themeforest package -this is the .zip inside the whole package you download from Themeforest-.
Package contents
- PSD Files — Contains all the PSDs files well grouped in layers to help you to customize in a visual way your new portfolio in a very easy way.
- Documentation — Inside this folder you will find this same documentation updated with the last changes.
- Licenses — Flamingo Theme is using some third Premium plugins, the licenses for them are included within this folder.
- Installable theme file — This is a zip that will let you install the theme in a very easy way as you can see in this section.
Requirements
Before to start working with your new portfolio, make sure that your Wordpress version is updated to the latest one.
You can know more about Wordpress requirements clicking here →.
Theme Installation
Activation using the Wordpress Dashboard
Basically there are two methods to install any WordPress theme. The first one is using the Wordpress Theme installer and the second is installing it using FTP. Let´s see the first one.
WordPress Theme Installer
- Installing the theme using the Wordpress Theme Installer is so easy as login into the Wordpress Dashboard and search for → Appearance → Themes.
- Here notice the tab at the top side → Install Themes, here you must to click on "Upload".
- Now you must to choose the zip file you will find within the whole package you downloaded from Themforest → "flamingo.zip".
- The last step is clicking "Activate" once all the files are correctly uploaded.
Via FTP (alternative and advanced method)
- Using your FTP client, for example Filezilla, log into your server via FTP and search for your themes folder within → wp-content/themes
- Here you must to place the main folder you will find within the whole package you downloaded from Themforest. This folder is called "flamigo-theme" (the unzipped version).
- Once your files are placed (completely uploaded to your server), log into the Wordpress Dashboard and go to → Appearance → Themes and there you will see the screenshot for Flamingo Portfolio Theme, just click on "Activate". Voilà! You are ready to start with your new portfolio!
Troubleshooting
If you find some error installing the theme like "Missing style.css" or something similar, please, make sure you are uploading the correct zip file. It is important to have into account that the file you must to install is the zip inside the whole package you download from Themeforest "flamingo.zip".
In case you can´t solve some install related issue, just open a support ticket and we will help you with this issue.
IMPORTANT IN CASE TO UPDATE SINCE v1.4.5
If you are updating the theme from an older version than v1.4.5 you must have into account a very important code modification that could affect to your current map configuration within your contact page template. If you update you could notice that the contact form won´t show anymore due to this reason. To fix this issue is so easy as opening your plugins area and to deactivate "Advanced Custom Fields: Location Field" plugin. You can detele it if you prefer. With this, you will have back your contact map within your contact page, just pass again your location info there and save the page in order to get back your map.
We are sorry about this possible drawback, but these modifications will help to work better and optimized with your theme. This component was updated in order to work in a better code optimized way.

Required Plugin Installation
In order to take more advantage the theme ask for installing some plugins, we recommend to install all of them. So you can create every element and parts of the theme.
In this sense, once you will activate the theme you will notice a yellow square in the top part where the plugin assistant ask you for installing the included plugins.
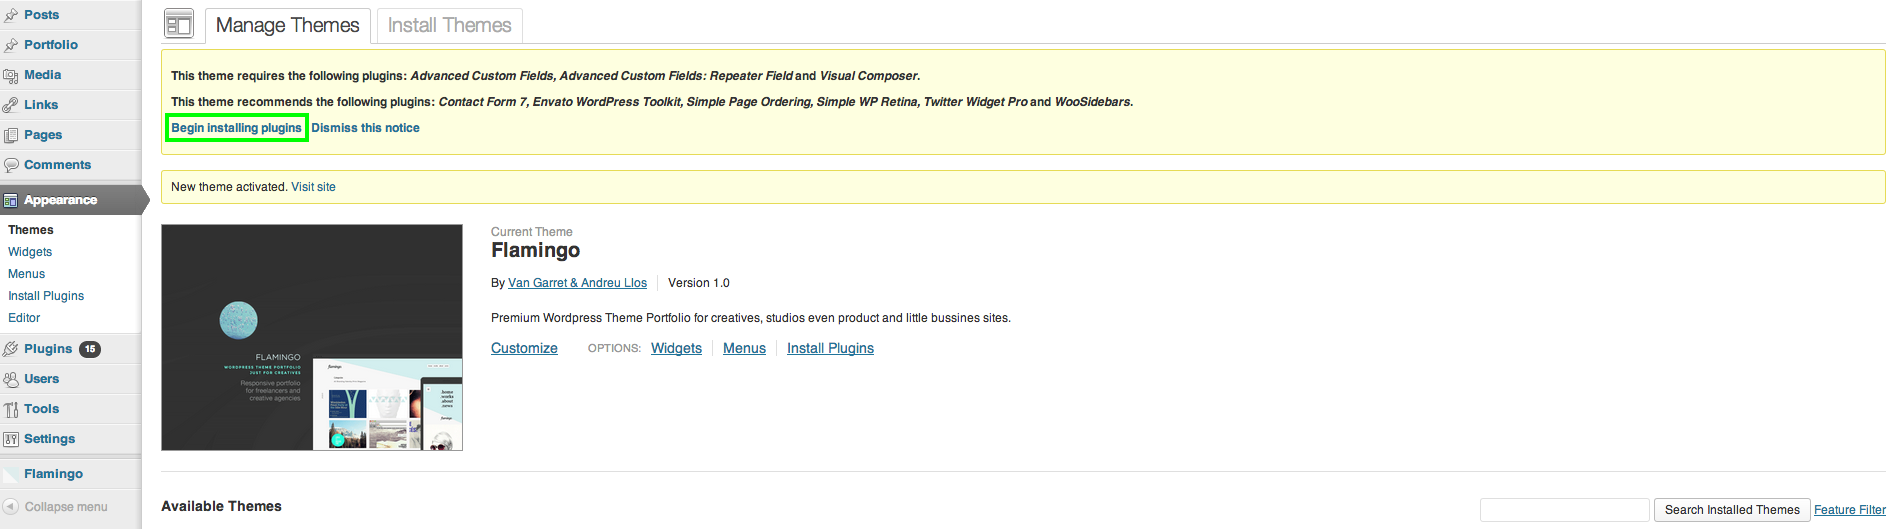
Required Plugins
- Visual Composer
- Repeater Field
- Advanced Custom Fields
- Advanced Custom Fields: Repeater Field
Recommend Plugins
- Contact Form 7
- Envato WordPress Toolkit
- Simple Page Ordering
- Simple WP Retina
- Twitter Widget Pro
- WooSidebars
Theme Features
Flamingo Theme Options
Flamingo uses a custom framework that let us offer you a very easy option panel to manage each part of the theme. You can change color schemes, layouts, fonts, sidebars, filters and a lot of different options.
Accesing the panel is so easy as opening the "Flamingo" option you will see within the Wordpress Dashboard.
Here you have a screenshot in order to know more about the options panel.
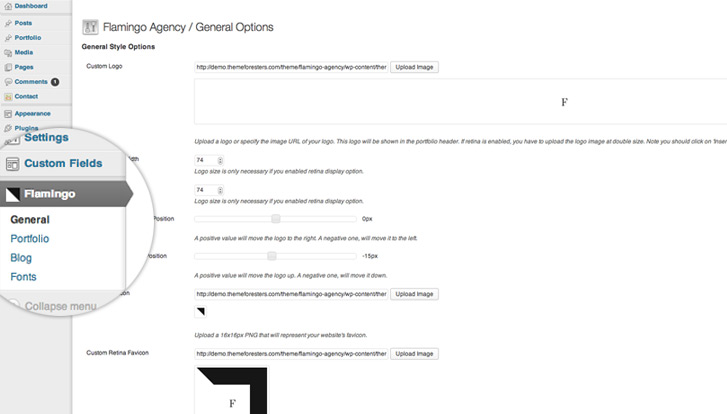
Theme´s options overview
Theme Layouts
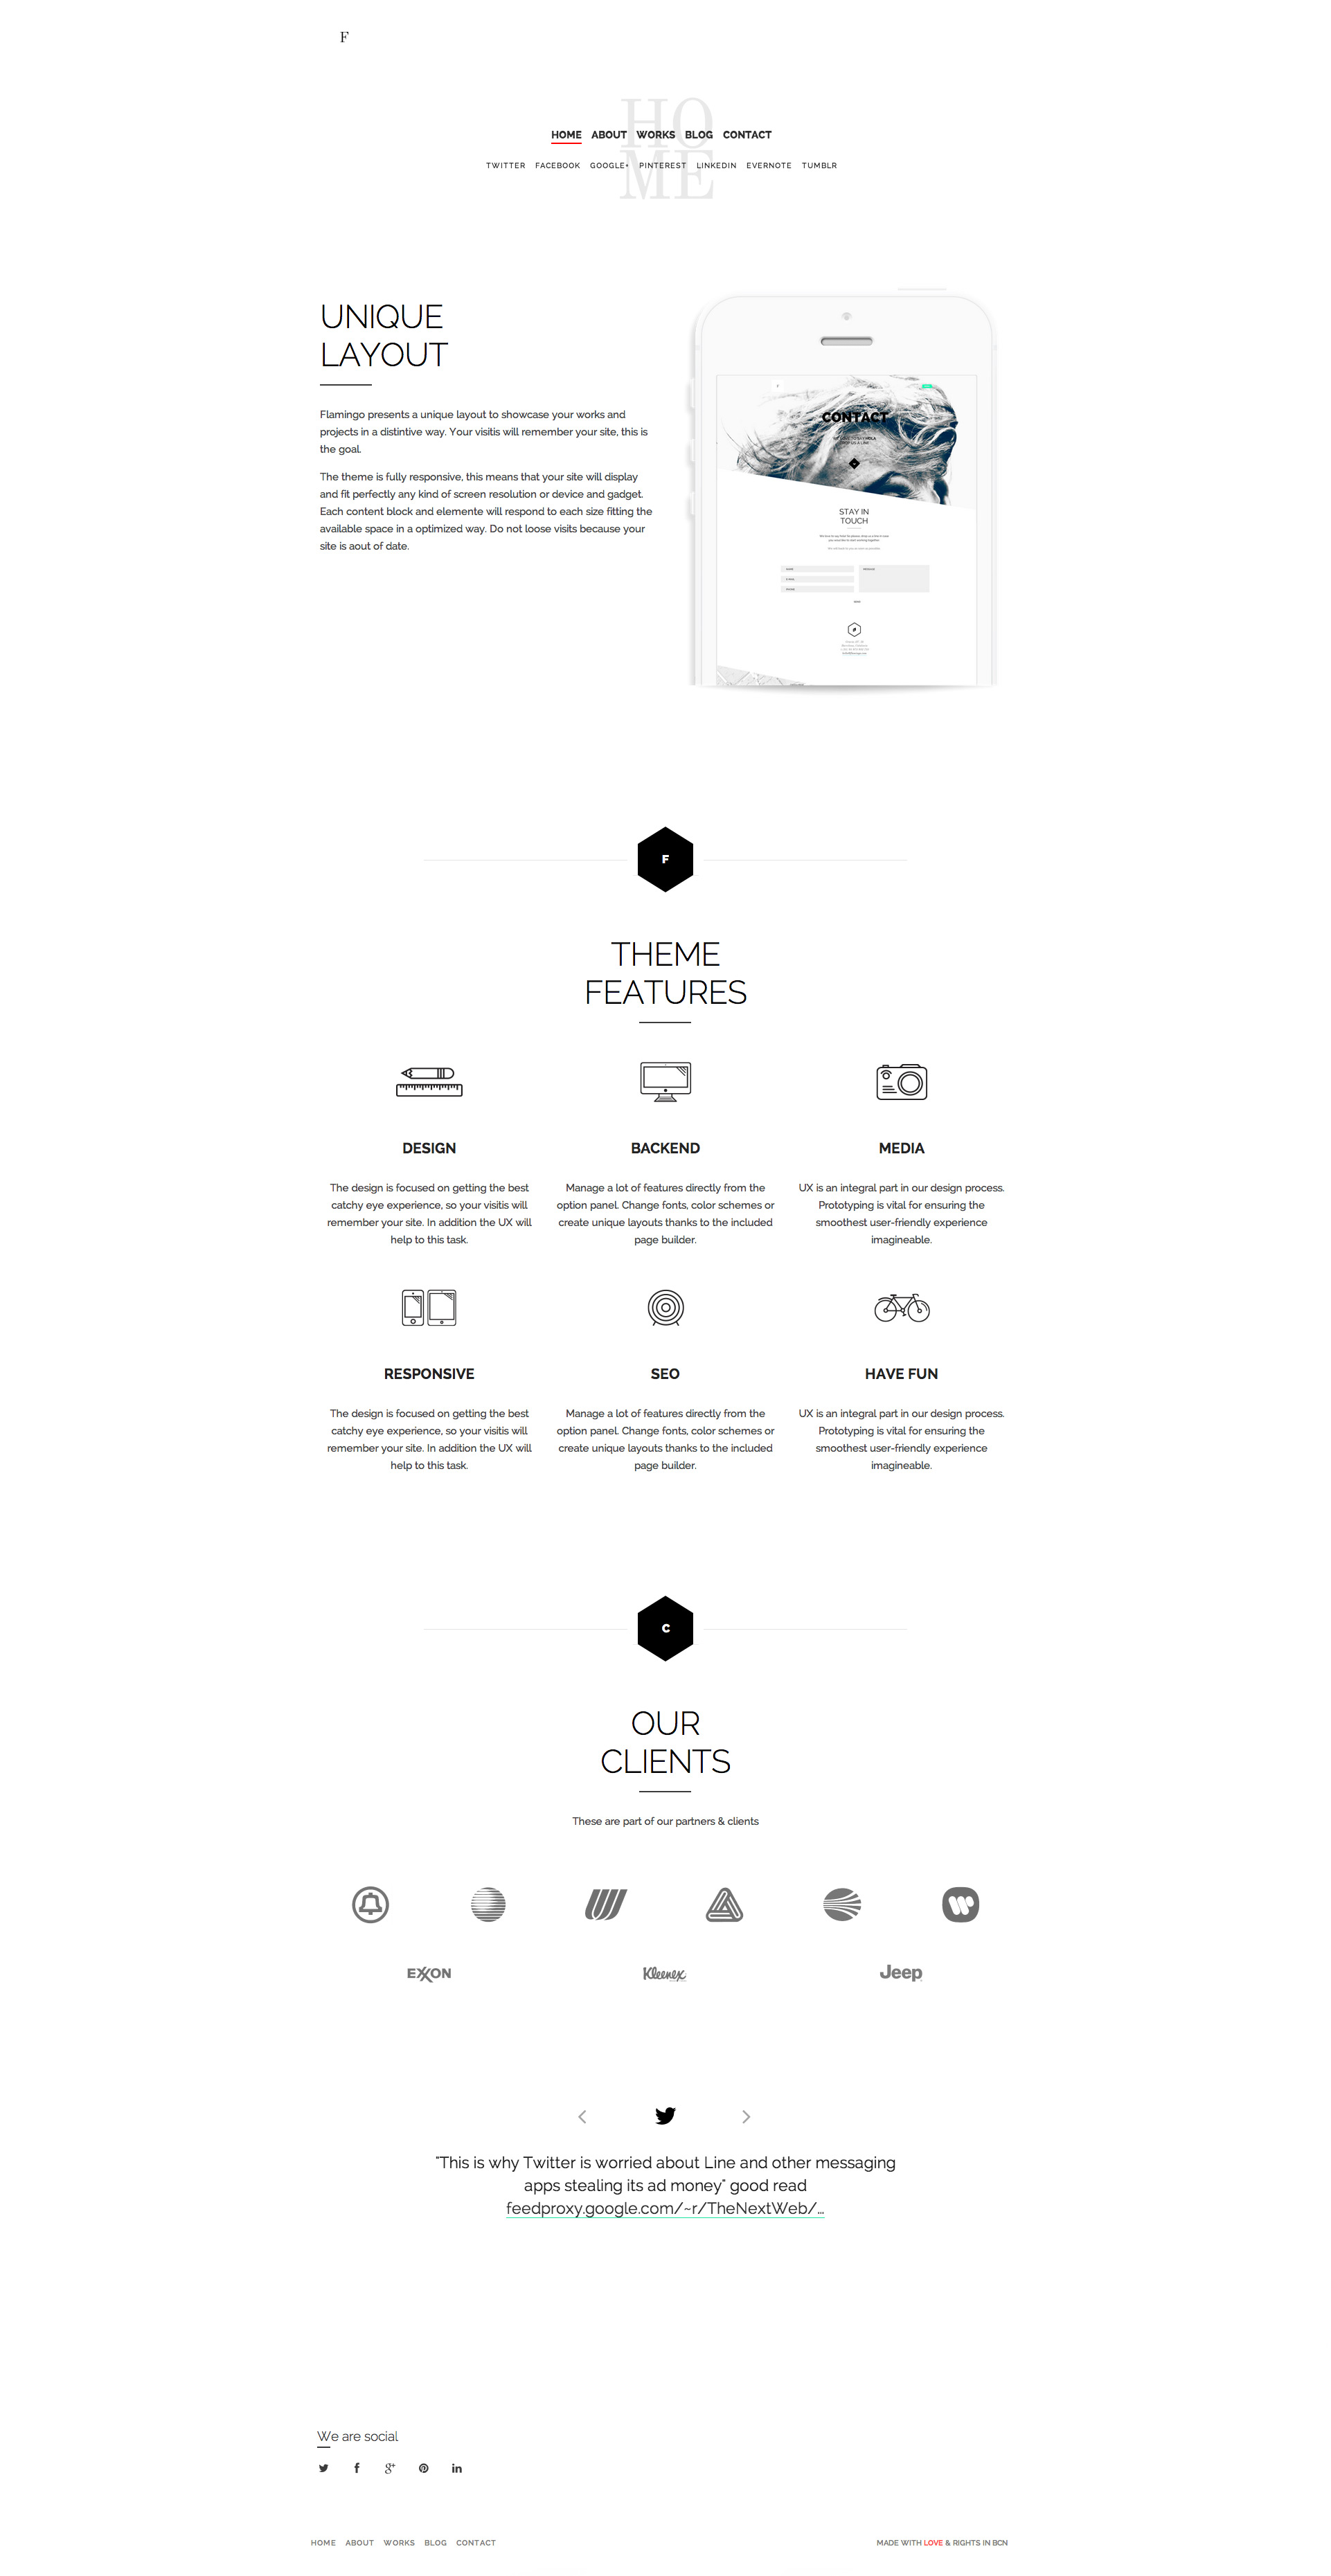
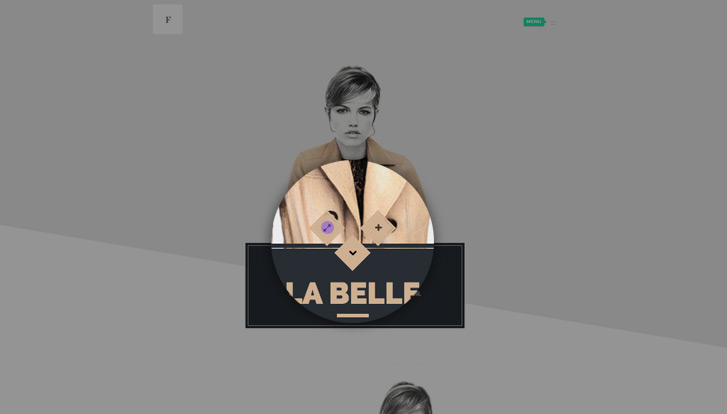
Flamingo Theme Layouts
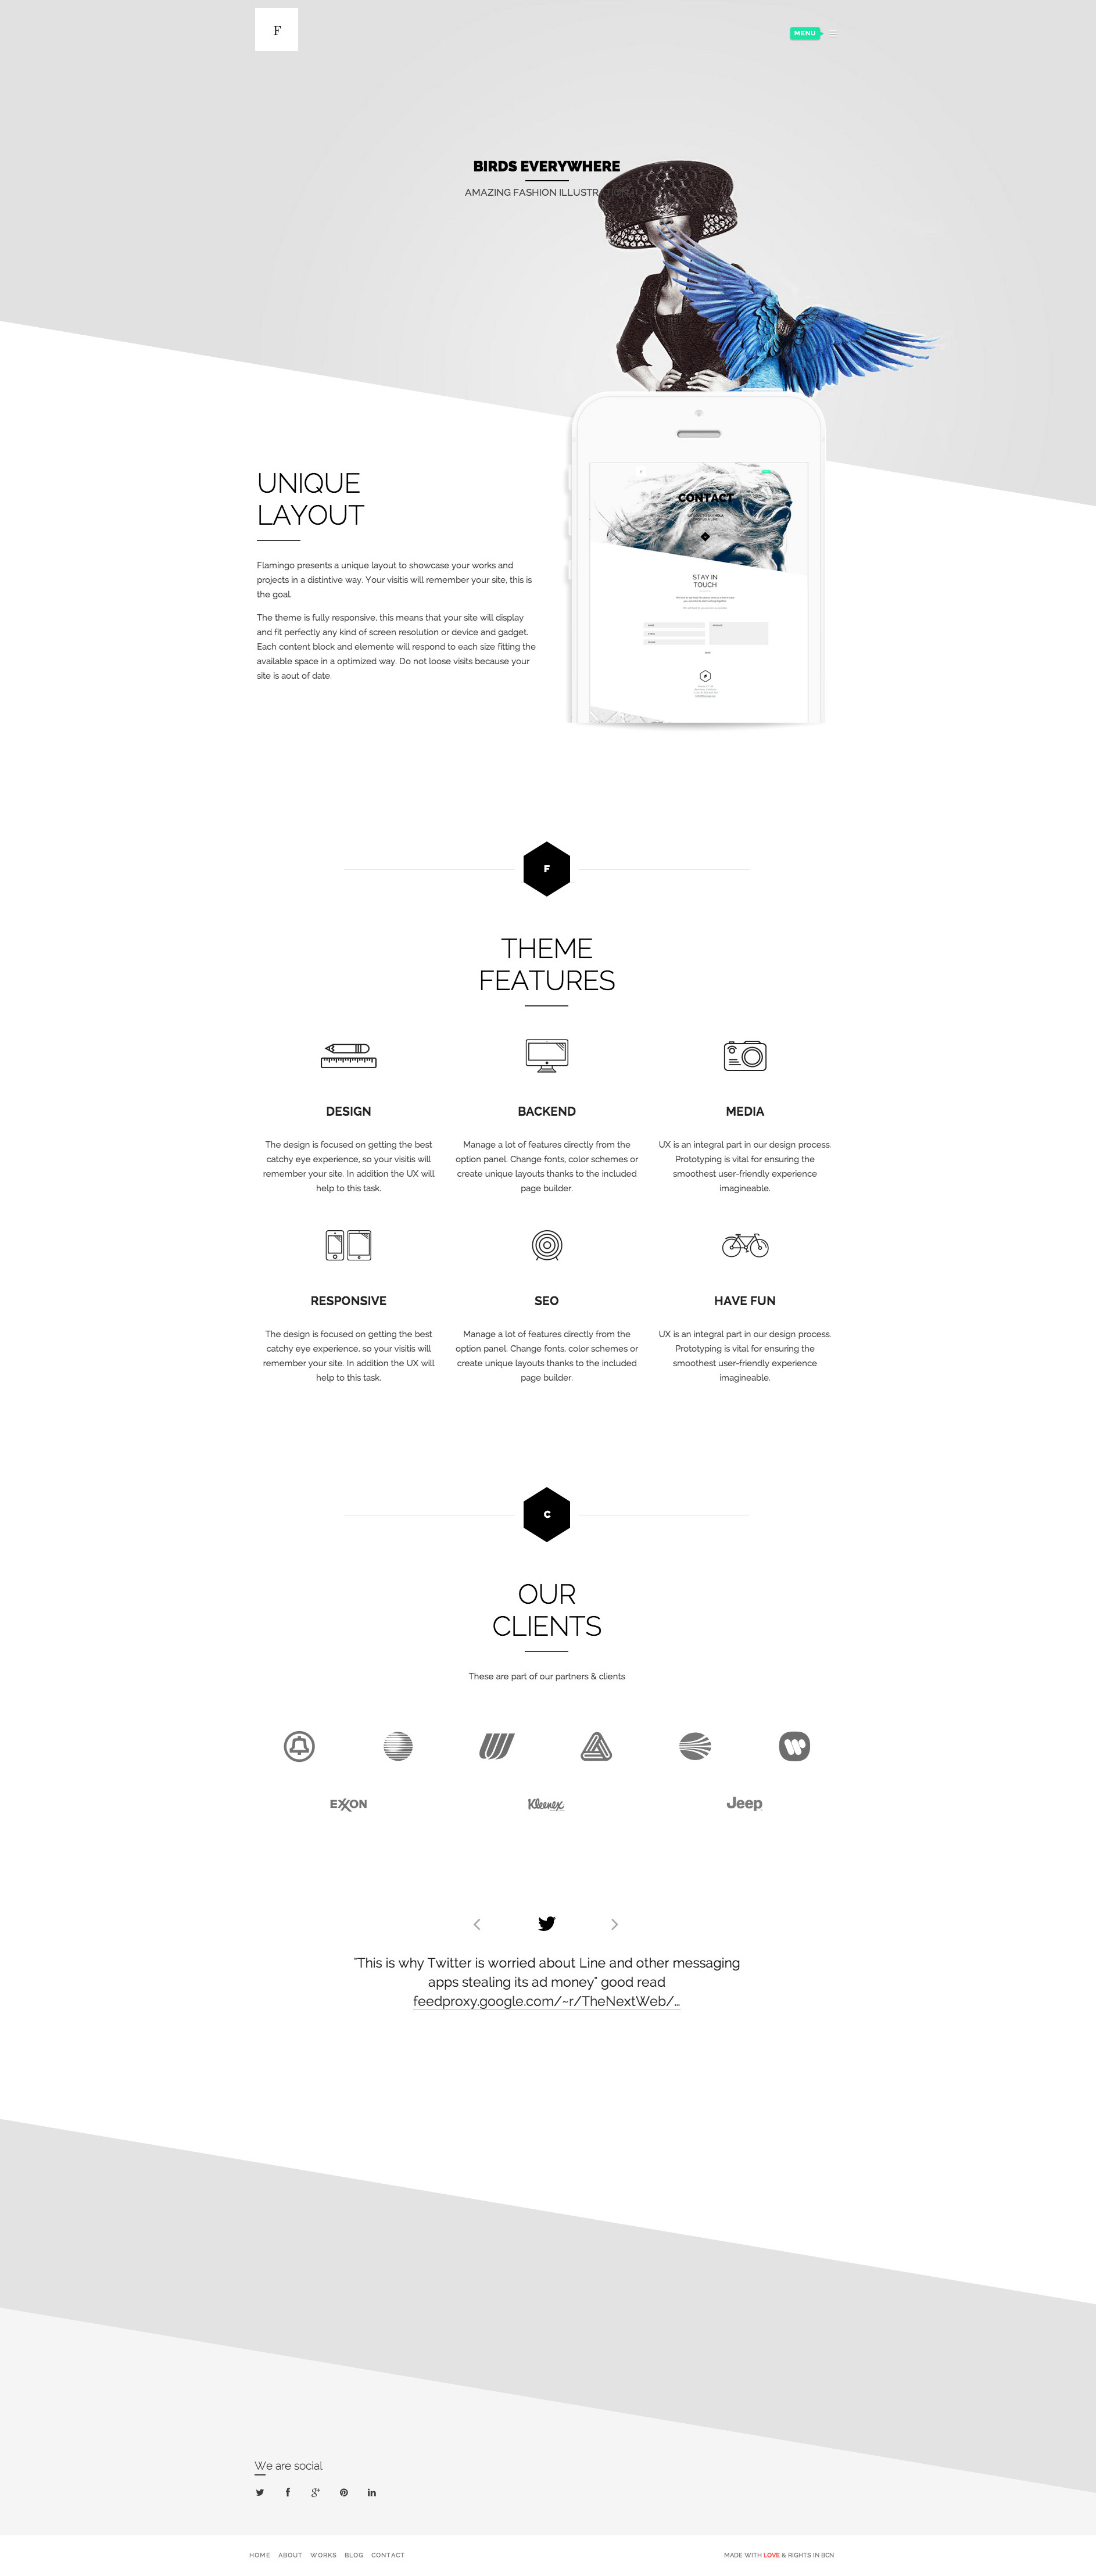
Flamingo pressents three complete different layouts. The main one is an angled view of the contents. Giving to them a very unusual and dinamic aspect. For sure this layout will be very atractive for your visits making your site a memorable one.
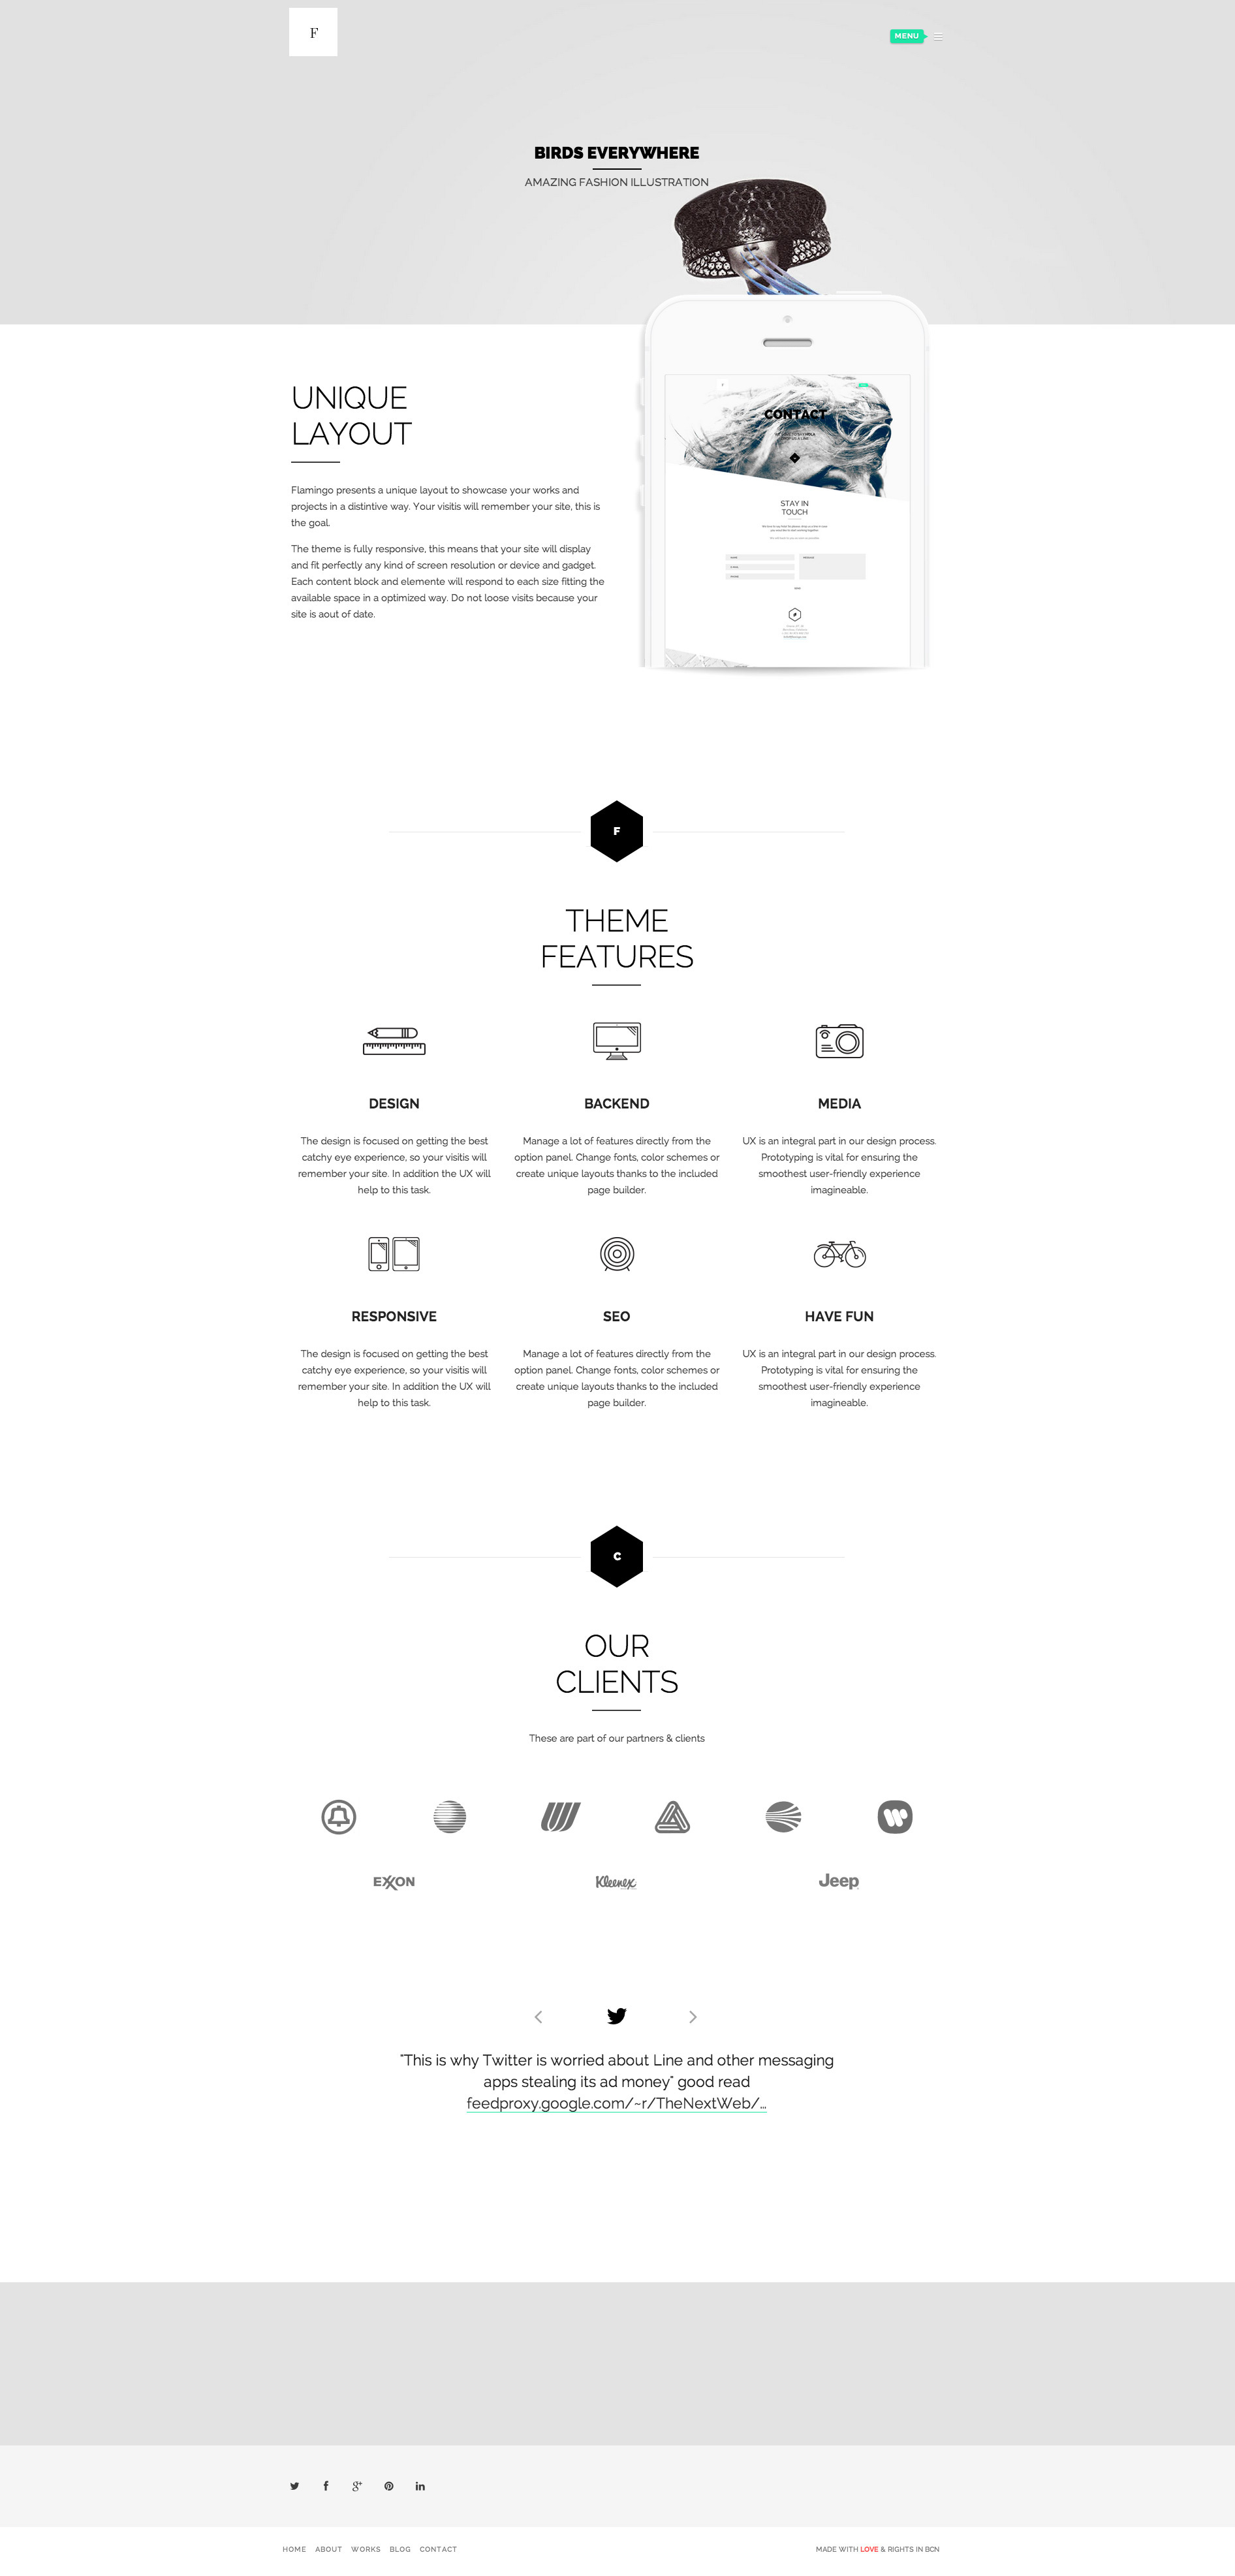
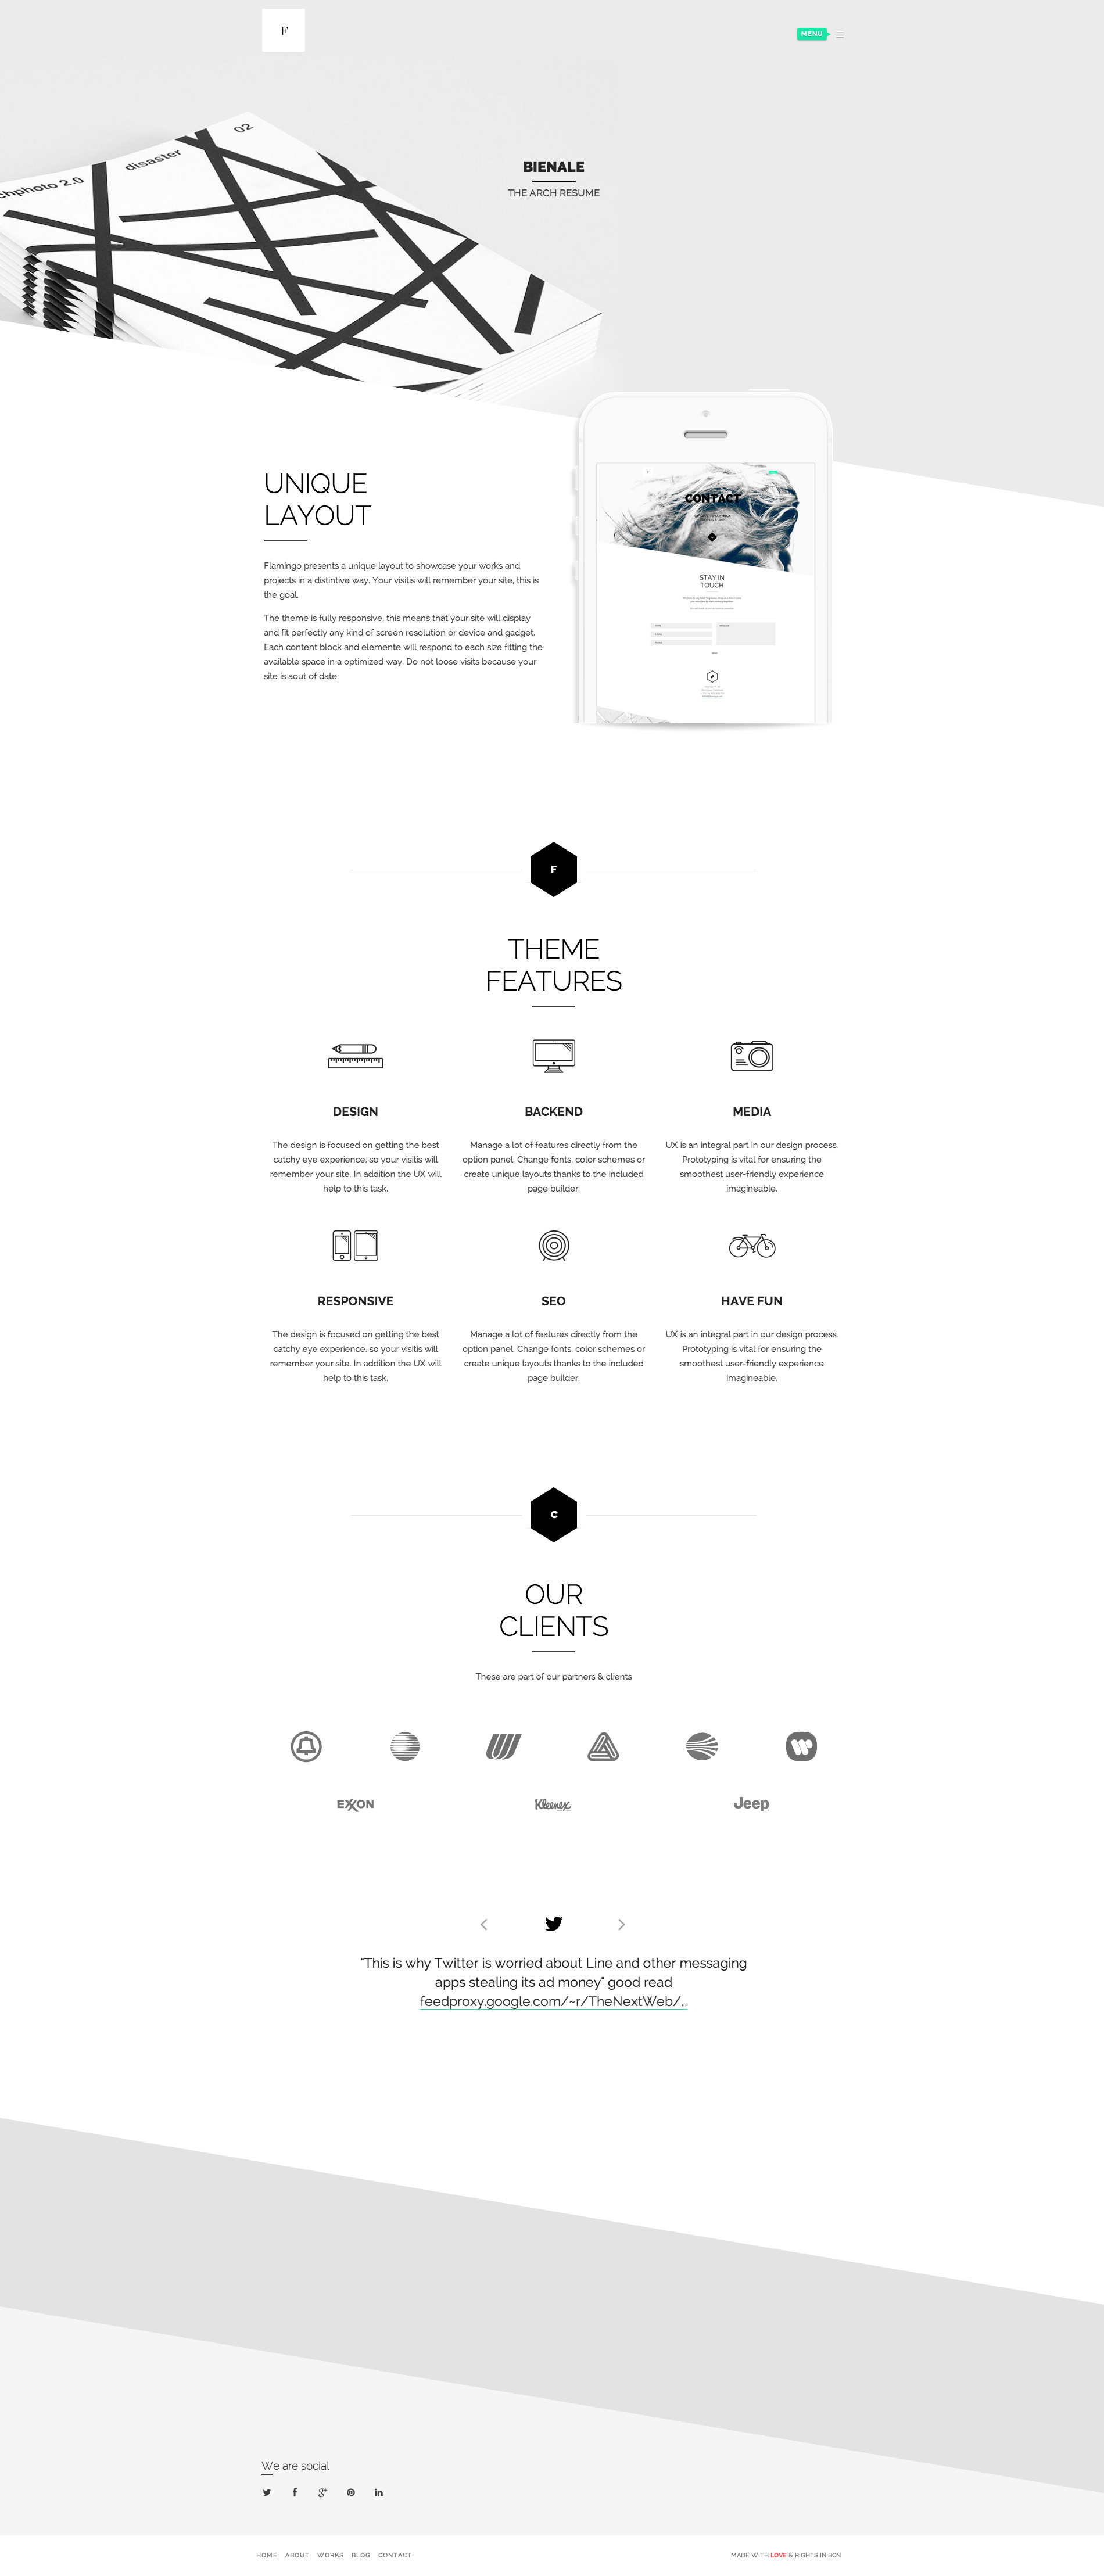
As second option, you can configure your site with a more standard layout. This with the use of big images will let your site differentiate from other in a quick view. Even if you prefer it, you can activate a trend "parallax" effect in order to get this background effect.
The third option lets you configure your site as a minimal site without the use o big images or other elements of this kind. Here you can view a demostration of the three.
Angled layout detail
Straight layout detail
Minimal Layout detail
Creating pages
How to create a New Page
In order to make easier to create your own pages Flamingo let´s you add your contents in a very easy way. For this just select a template and then use the Visual Composer plugin to create advanced layouts in a few easy steps.
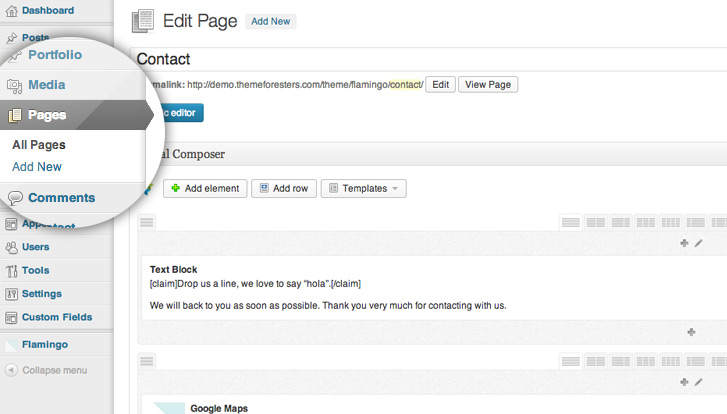
- Click on "Pages" → Add New to create a new page.
- After adding your page´s name you must to select from Page Attributes area one of the Templates available from the list.
- Now you are ready to add your own content using the "Classic" Wordpress editor or using the Visual Composer plugin you activated within the starting steps in order to work in a easier way in order to add your new content. Also you can copy/paste any of the dummy estructures you will find below.
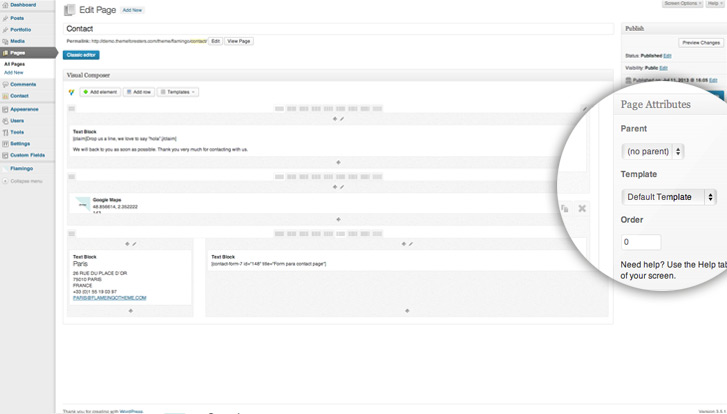
Templates to choose from "Page Attributes"
- Default Template — The default template is used to create any kind of pages without sidebars.
- Blog — Is used to create the blog section. Just assign this template to this page and start posting!
- Contact — This is a special default page where you can include a google map as background at the bottom of the page. This option is not available for "minimal layout".
- Page left sidebar — A page with the sidebar enabled and placed in the left side.
- Page right sidebar — A page with the sidebar enabled and placed in the right side.
- Portfolio — This is the template that will let you create the portfolio area.
Home page
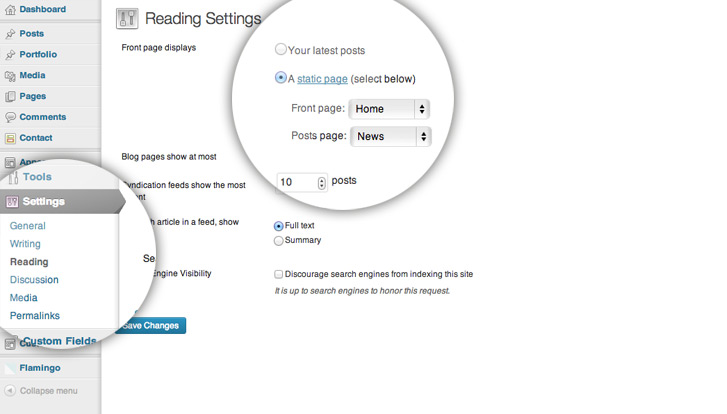
Setting up any page as home is so easy as clicking on Settings → Reading, and select "A static page" and choose "your homepage name" as Front Page.
With the code below you can build a homepage with the same look and feel you can see in the official demo. This page is created using a "Default Page" template and this code based on Visual Composer´s Widgets specially developed for Flamingo Portfolio Wordpress Theme.
Homepage
For this, just create a "New Page" and select the template '"Default Page"'. Then copy/paste the following code in the WordPress text editor.
Blog
Setting up a blog page is so easy as clicking on Settings → Reading, and there select "A static page" and choose your "Blog" page as the Posts Page.
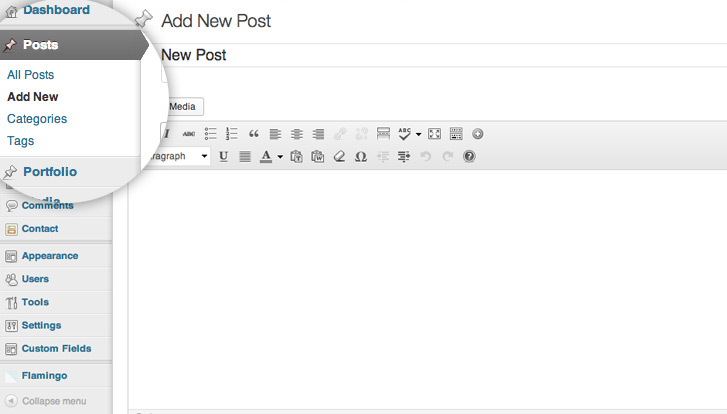
Start adding posts to your blog just clicking Posts → Add New.
Important
For this page/template you will notice that there is not any background image option available, this is due to this special section gets its background from the general options. For this, you will need to configure it in Dashboard > General > Angles Background Type > (Select) Fullscreen Image > (Upload Image Button) Angles Background Image > Upload your default background & after this click at the bottom botton "Save changes". After this, select your recent uploaded image and click again in "Save changes", as you would did with any other standard Wordpress feature.
Now you will have set a defaul fullscreen image backgroun for any page, specially for "Blog" section. Also, you must to have into account that each single post/article will get its own background from its own featured image.
This screencast will guide you creating new pages and generating new content from dummy content included within this document.
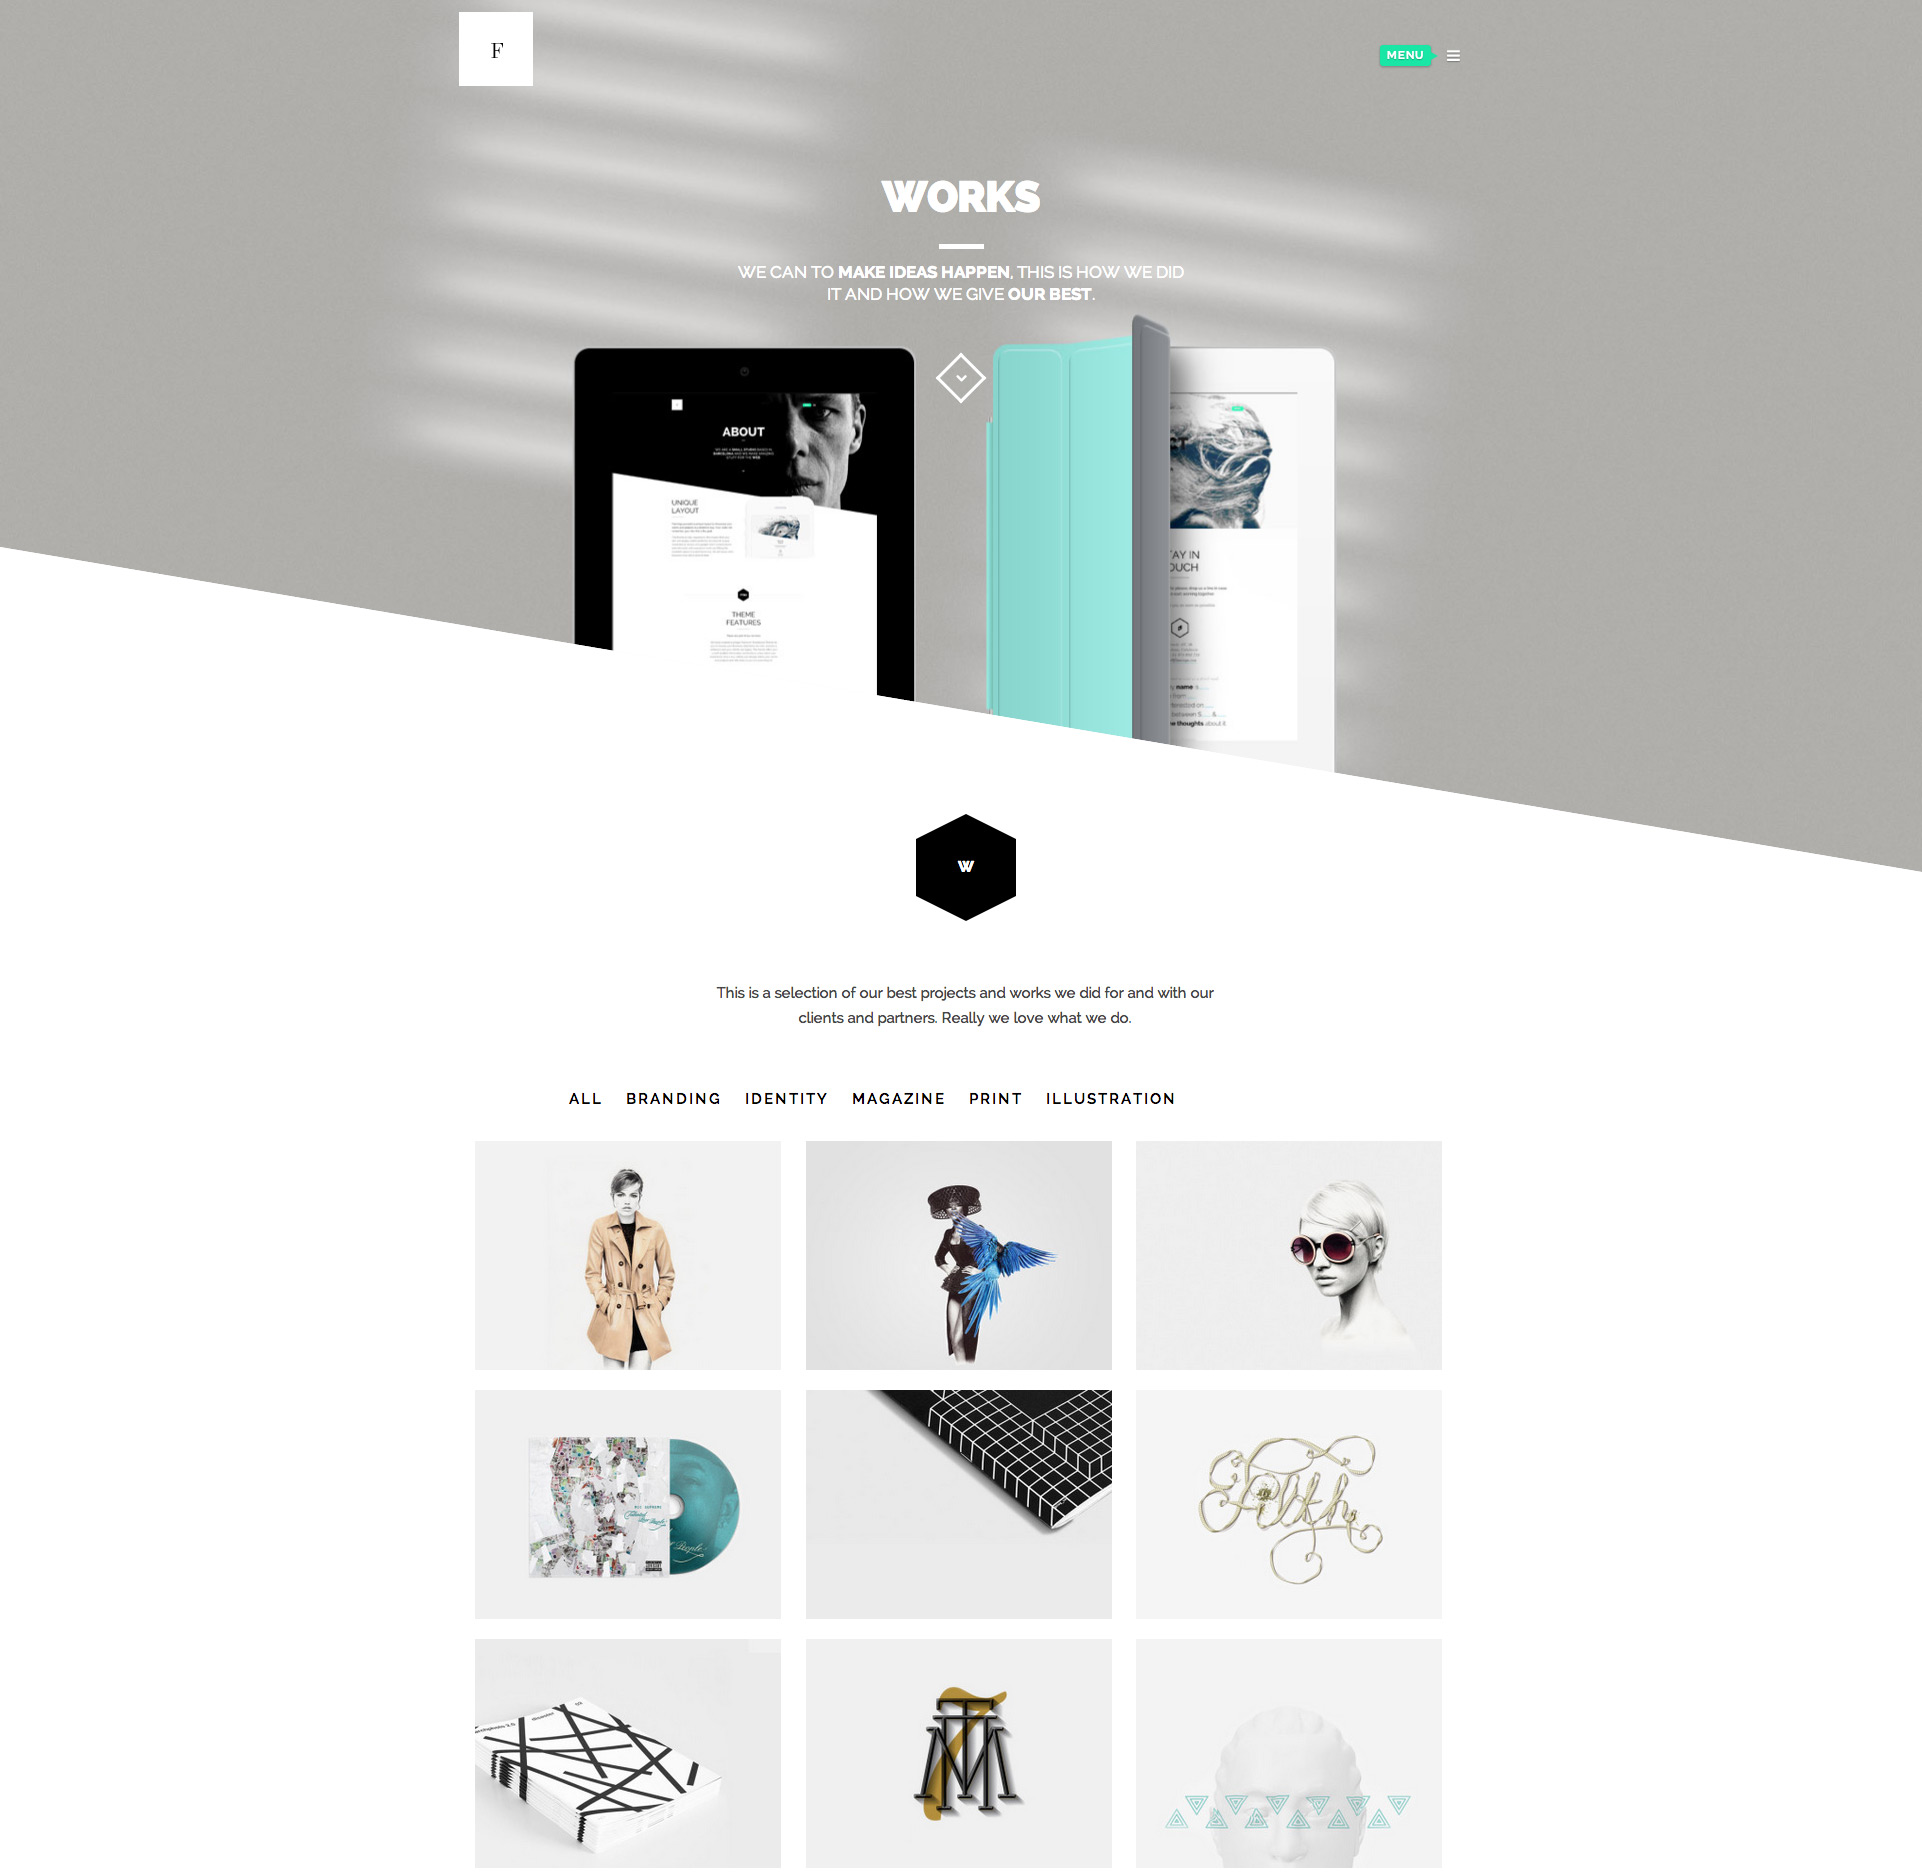
Portfolio Page
Maybe the most important template of the theme.
Here you can create a grid to display your works & projects.
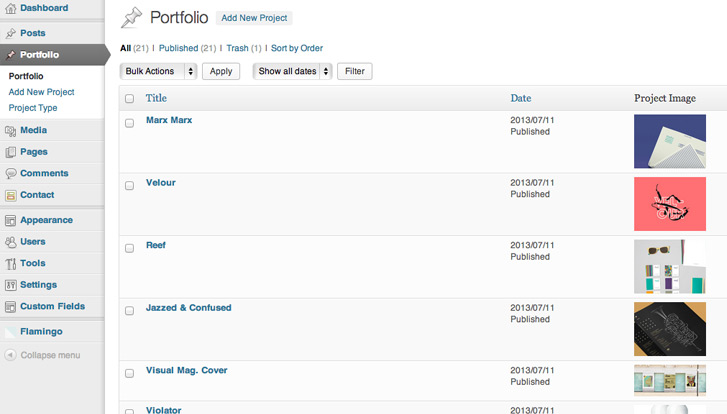
Add New Portfolio Items
Start adding portfolio items clicking on Portfolio → "Add New Project".
Once you start creating your project you will notice that the theme offers you some interesting options.
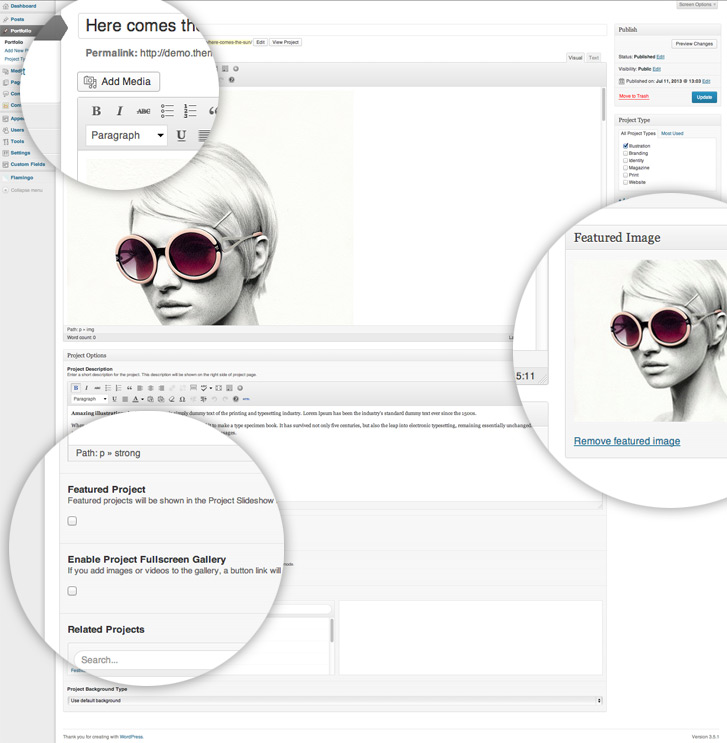
Detail & explanation for each one
- 1. (Default option - Use default background). Here you can set up a different background only for this page/project. You can select a plain color, a fullscreen background or a new pattern. By default the theme will use the settings from "General" section within the option panel.
- 2. Enable slideshow. If you enable this option, you can create a slideshow for the header of this page. This slideshow will work in the same way that the home´s does.
- 3. Project description. Here you can add the description that your visits will see at the top of each project below the title. With the below option you can select a particular color for this header title.
- 4. Project info box inside content. This option will displace the header project title to a box over the content as part of it.
- 5. Featured project. If you enable this option you will include this project into a queue of works that will be displayed if you add in some part of the theme a slider with Visual Composer. Notice that this slider only works inside the content, you can´t use this feature to create background sliders.They are different features.
- 6. Enable project fullscreen gallery. Check it and you will be able to add bigger images to display them into an isolte gallery. This gallery can be configured from "Portfolio" options within the option panel. Here you can select from 4 different galleries, cool, right?
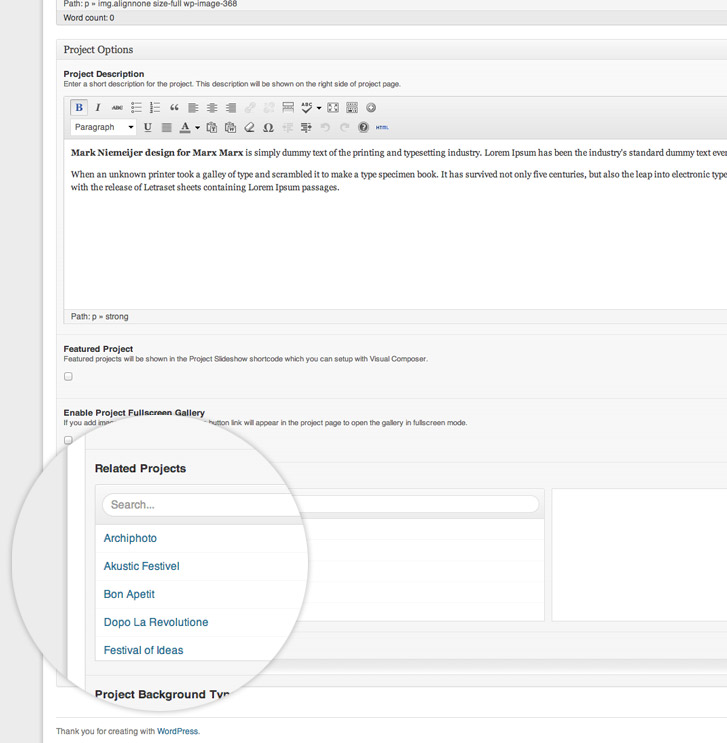
- 7. Related projects. Add up to 3 related projects to the current one. They will be displayed when the user hover the scroll handler. The fullscreen option, if enabled, it will be displayed too in this place.
Would you like to wacth a screencast about how to create new projects? Do it!
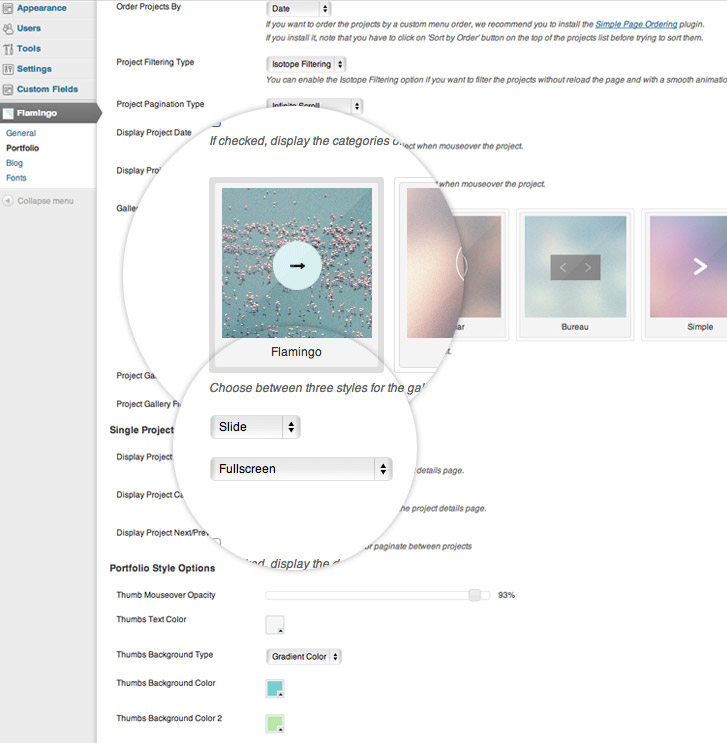
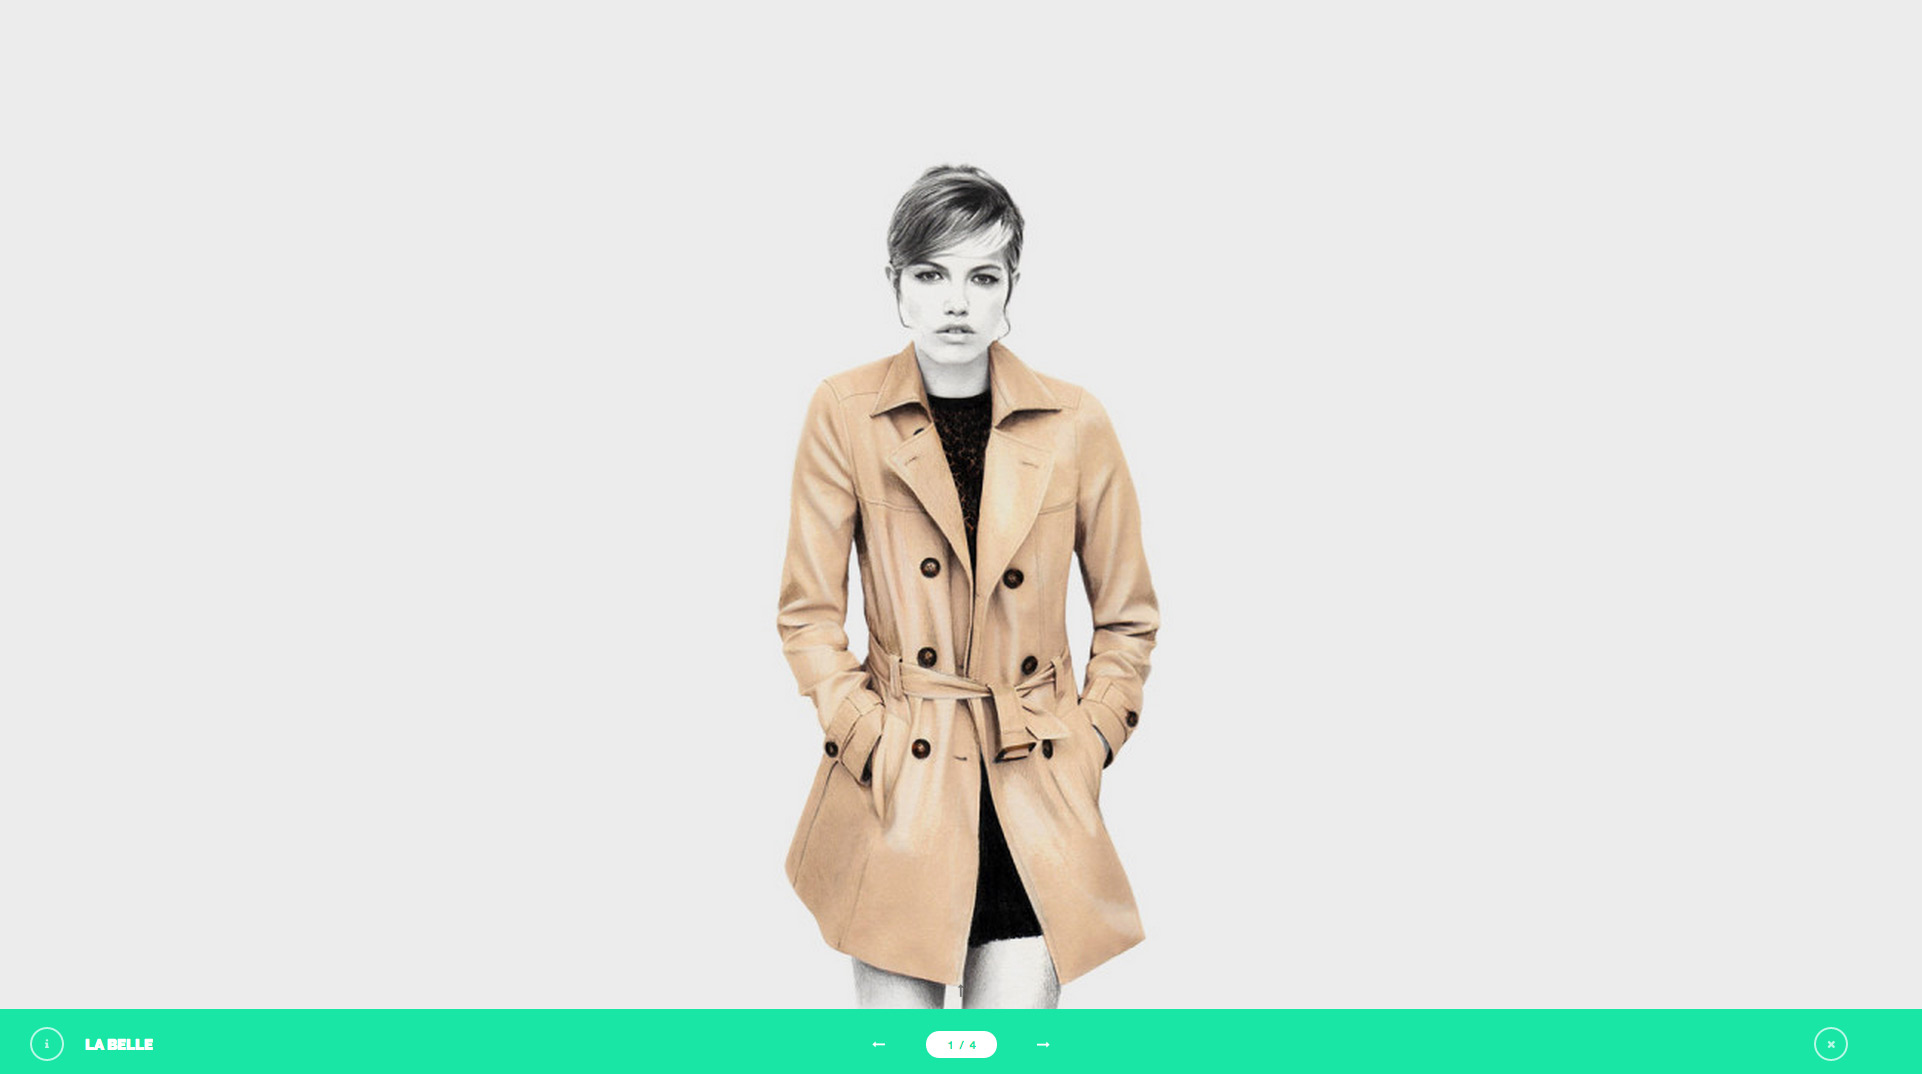
Add Fullscreen views for your works
You can add separate images for your portfolio items and display them in a gallery. Just select the gallery mode between three different modes. "Fullscreen", "Prevent upscale" or "let the user choose the view".
Also you can select between four different skins for your galleries. Just in a couple of clicks your new galleries will be ready to display your amazing works!
Notice here that this is not any lightbox solution or similar. This is a complete gallery with a powerfull engine with many options.
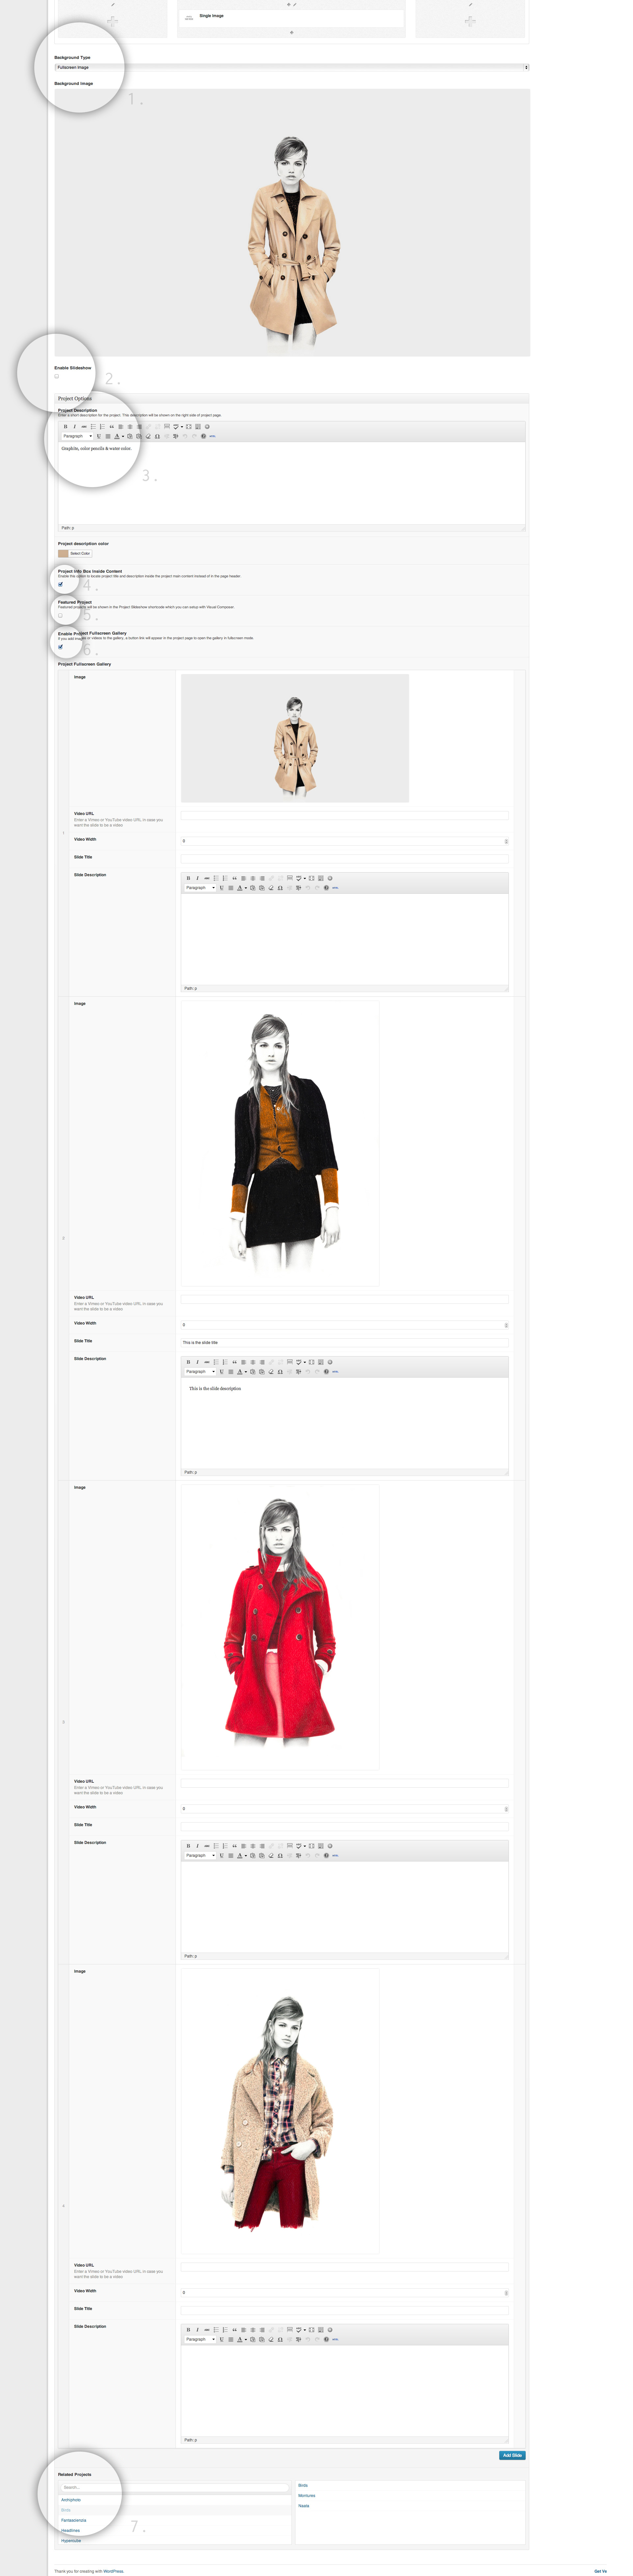
When you have selected from the option panel the gallery skin and the mode, you can start adding projects to your gallery. Let´s see how easy is this process.
Within your project where you want to display images within the gallery.
- Select "Enable Project Fullscreen Gallery" option
- Click on "Add Slide"
- Click on "Add Image" in order to add the first image into the gallery. You can select it from the gallery or uploading a new one.
- Once your image is uploaded you can add a slide title and description if needed. This info will be displayed with the slide into the gallery on top.
- Add so many slides with the same process as you could need, this is free ;)
- In case you want to add a video slide.Just paste into the video field the Youtube/Vimeo URL you want to add to your gallery. If you do not pass a particular width into the box for this task, the video will be displayed in fullscreen.
Well, your gallery is now ready to work. If you visit now the project you will notice how a new button appears into your info area. Just click it and enjoy a new isolated view of your project with the configuration you placed from the option panel.
If you want to review the part of the screencast about how to work with the inner gallery, click here to watch directly this part.
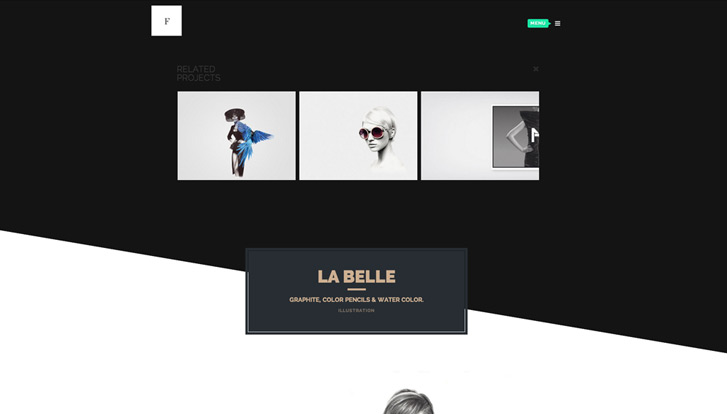
Related projects
This feature allows you adding "related projects" into your current project. You can select from any of the projects created with a limit of three.

If you want to review the part of the screencast about how to work with the related projects, click here to watch directly this part.
Page Builder
Flamingo includes a "page builder" that it will let you create pages in some few minutes. Just take a look to the demo in order to know more about how to work with it. Just take into account that the Visual Composer widgets signed with the theme´s favicon are exclusive for Flamingo Wordpress Theme. These widgets will allow you to create all the special elements based on the theme, like the featured slide, the projects grid, the twitter feed or some other interesting elements.
In adition we have included some helper classes to let you work with some elements from the page builder with more precision. Imagine you have placed an image into your composition and you would like to move it 50px to the top from its current place. Well, to do this you just need to add, using the "Extra Class" feature from Visual Composer, a new class of this kind. ".move-top-50" or ".move-bottom-50". You can move to top or bottom in 50 intervals starting from 50 to 400.
If you take a look to the demo´s home, at the head you will see a phone besides the intro text. Well, this phone/image was placed 50px to top using this technic.
You can manage where to enable the page builder just opening within the dashboard > Settings > Visual Composer.
Notice
If you would like to use the icons used within the demo site for the home & about sections, take a look to this great site.
Contact page Page
Notice
Since July 2016 Google has changed its policies in order to embed Google Maps in websites. As part of this new method, you must create your own Map API key if you want to display maps within your website. But no worries, the process is really easy.
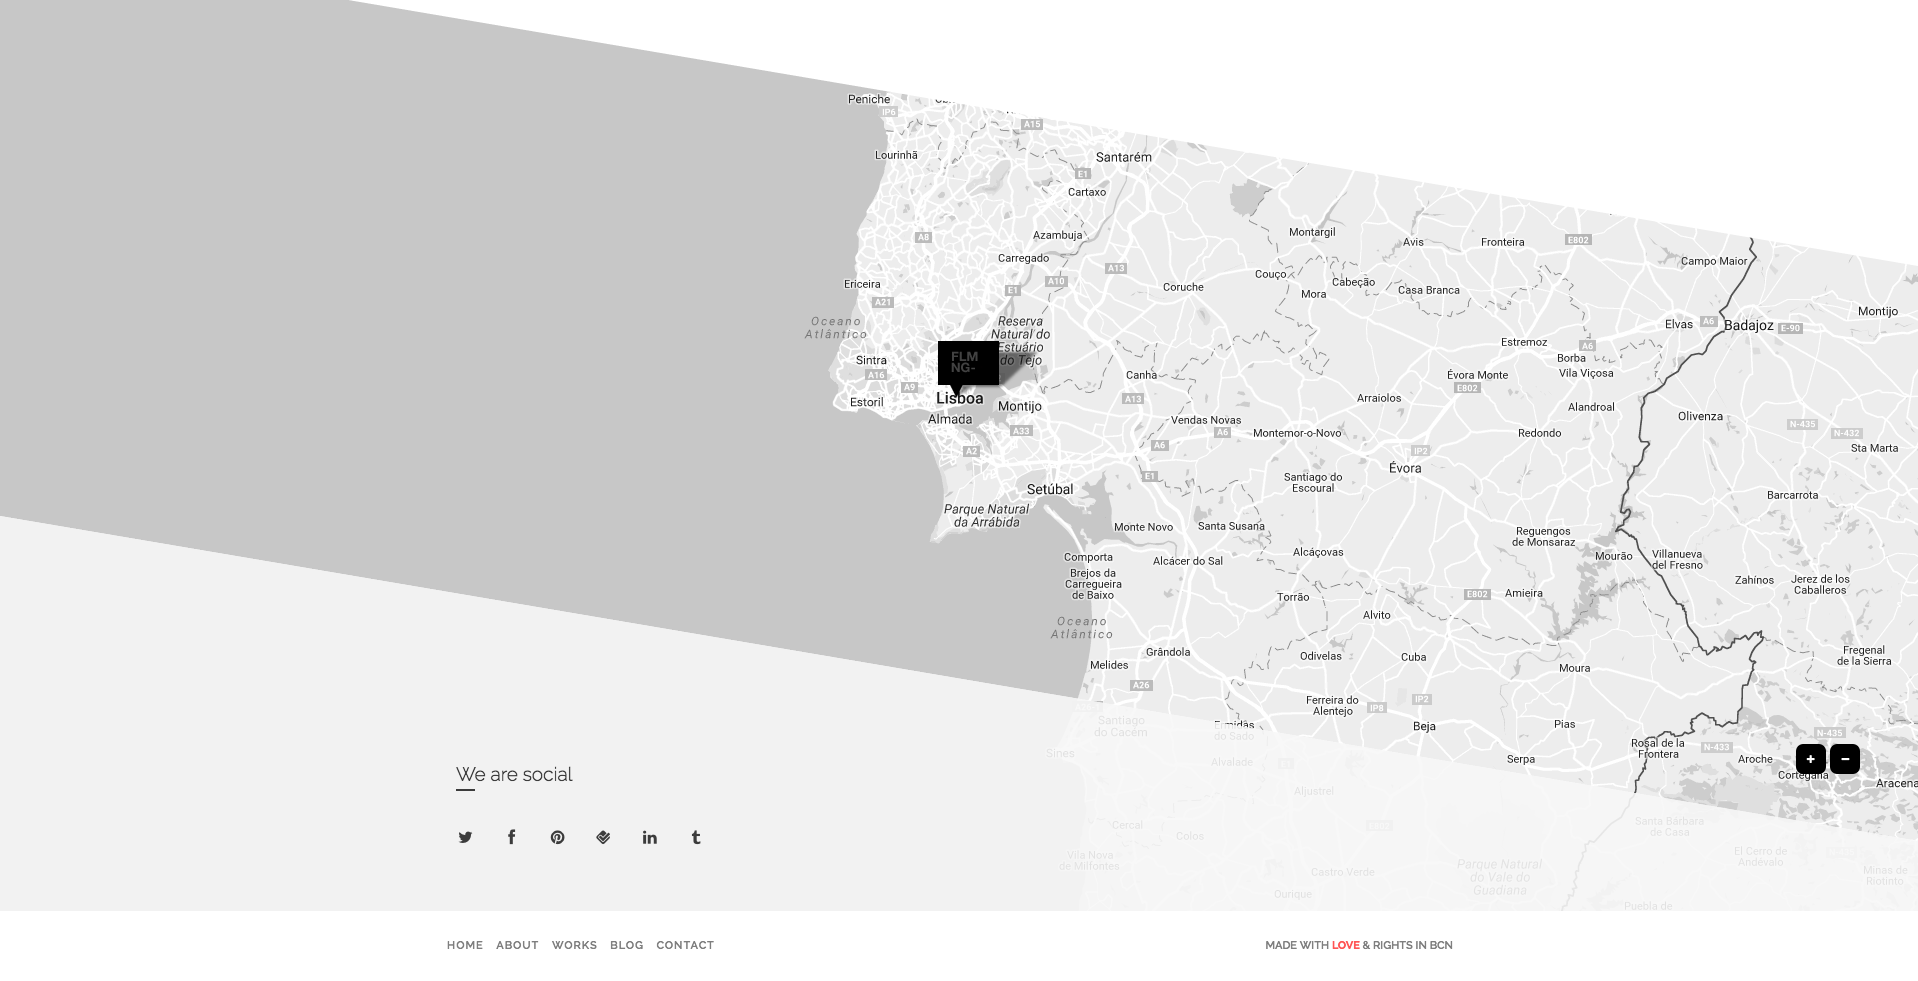
Adding your own map is as easy as creating your own Map API Key, for this, just read this article and watch this video until minute 2:00. Once you have created the key, you just must enter it in this field within Flamingo Options > General > General Options > Google Maps API Key.
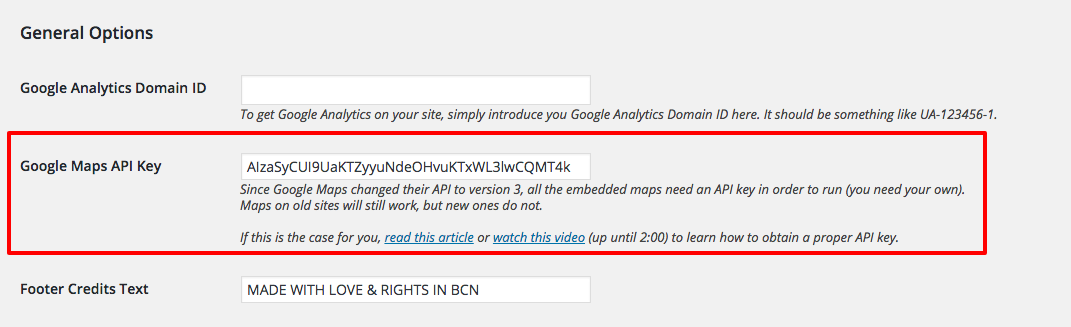
This option is only available for Flamingo v1.4.9.2+ and it is needed for installations/new domains done after July 2016 because the new Google Maps policies update.
Other demo pages
These pages are created using the Visual Composer method, so just copy/paste this codes into your Wordpress text editor and the layout will be automatically generated.
About Page →
Just create a New Page, select a "Default Page" template and paste the following the following code in the WordPress text editor.
Contact Page →
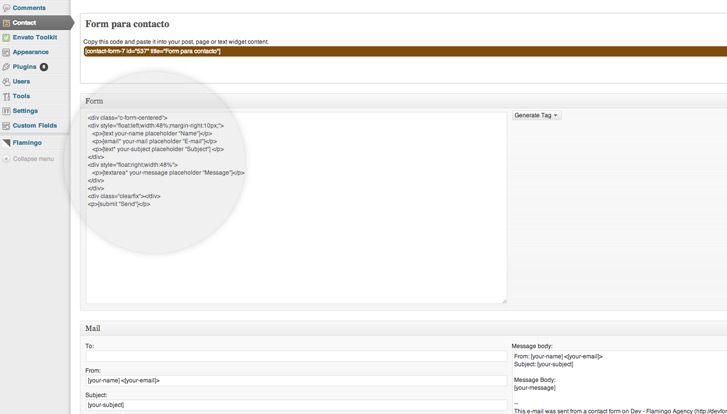
Just create a New Page, select the "Contact" template and paste the following code in the WordPress text editor using the classic editor. This code is based on Visual Composser widgets, but you will need to activate the classic editor in order to use it and then activate the Visual Composser.If you want to display a contact form like the one you can see in the official demo, you must to create a Contact Form 7 form using this custom code: (you will find this option in the Wordpress Dashboard as "Contact")
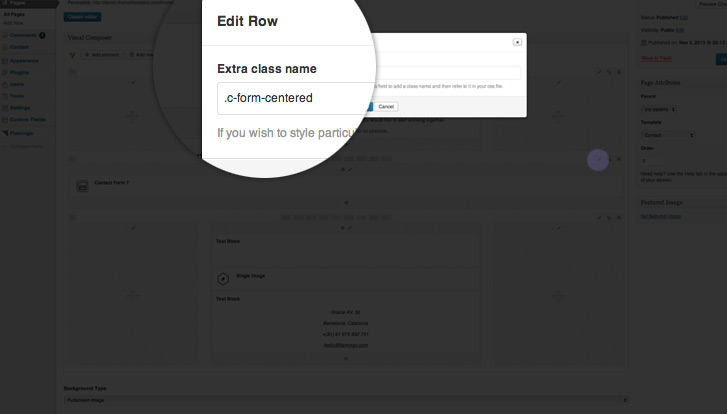
Once you have created this piece of code and saved your form, you must to open your contact page and using Visual Composer add this new form using the widget Contact Form 7. While adding it, notice that you must to include it in a new Visual Composer "row", using the "pen" button to edit the "row", you will find a new field with the text "Extra class name". Here add the class for the piece of code for your contact form you have created. This is ".c-form-centered". Now, your contact form will be ready to be displayed as you can see within the demo.
Take a look to the screenshots in order to know more about this process:
Styling titles of the main slider
in a isolated way
Special classes for setting up different colors for each slide within main sliders
Since Flamingo v1.33 the theme has new helper classes in order to let you set up different colors for each slide within your main slideshows. Now each slide receives a paricular class, something like "slide-01". So in this way, you can style each slide title, description and divider in a isolated way. For this, just follow this rules:
If you are using the child theme, just add these rules to your style.css. If not, just add them to General Option > Custom css field.
Notice that you must not include the lines of the example, they are a guide. Just follow the path for > Slide One on your slideshow - slide-0; Slide Two - slide-1...Slide N - slide-n
Navigation
How to setup your navigation
Once your pages are ready, you must to setup your menu/navigation.
To achieve this just follow the next steps to create and assign a menu to your site.
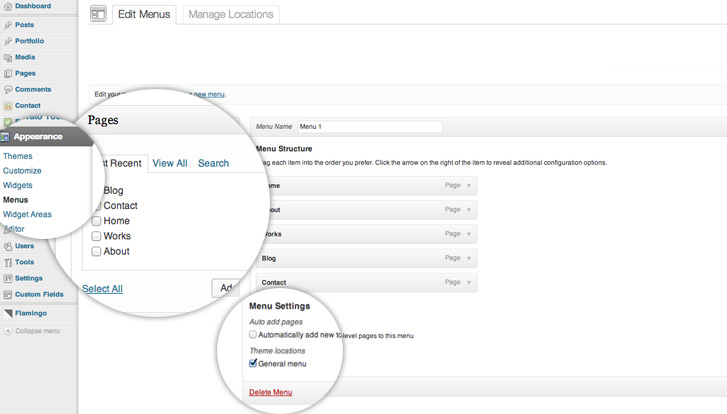
- Within the WP Dashboard click on Appearance → Menus and then click Add Menu.
- Enter a name for this menu and select the pages from the left box. Once they will be added you can sort by drag and drop or define a tag/name for each option that will displayed into your menu. Then, when your navigation is ready, just click on Save Menu.
- Now you must to assign the menu to the menu area. Notice the highlight bottom area in the next image.
Navigation Layouts
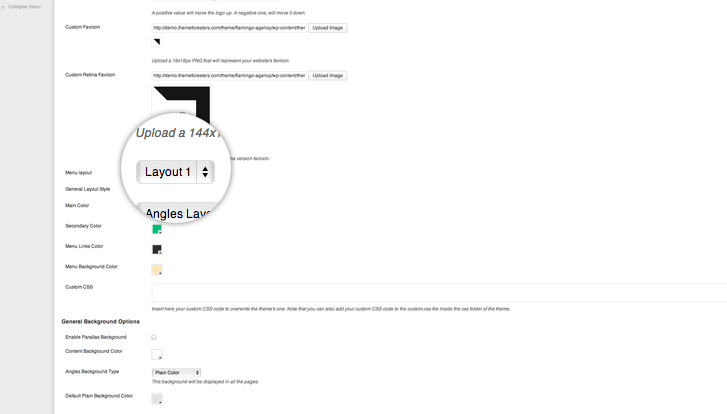
Select a navigation layout
Flamingo has 4 different navigation styles. These 4 options with the 3 different site layouts offer a lot of options and combinations to create different sites and presentations in seconds.
Furthermore, you can set up two of them as sticky/fixed menus. This means that you could create combining content layouts with menu layouts, more than 30 different look and feels and aspects. These are good news, we guess.
Selecting or changing your navigation style is so easy as changing your site layout. Take a look!
- Within the WP Dashboard click on Flamingo → General and search for Menu layout option.
- Here you will see the 3 available options. Just select the one you like and click "Save changes" button. Automatically your site will be configured to work with it.
- Below you will see two related options. Menu links color & Menu background color.. Just configure it as you like more. Easy, right?
Important
About sticky/fixed menus, just take into account that only Menu Layout 1 & Menu Layout 4 (opened), can be assigned as 'sticky' menus. Any other of the layouts will turn incosistence with this configuration. So we don´t recommend to use it. Only use the sticky opton to enable it with Menu Layout 1 & Menu Layout 4 (opened). Both are completely differente when 'sticky' option is enabled.
This feature is available since v1.3
Here you can see a little screencast about these new sticky menu new features.
Sidebar & Widgets
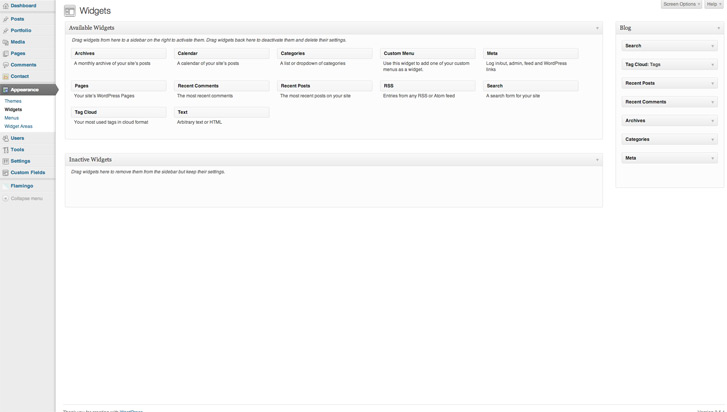
If you clinck on Appearance → Widgets in your admin panel, you will notice that there is a sidebar area available.
Adding widgets just just need to drag and drop them from the widgets area to the sidebar area.
You can define unique widgets for any page with a sidebar with widgets using the WooSidebars plugin included with the theme.
Third Party
If you are going to add WPML plugin to your site, we recommend to use the following configuration:

In this way your language option will be added within the main navigation with a new icon to highlight the option.
Hosting
You may think that this is not an important aspect of your website, but if you want your site to run really fast, you need to get good hosting. This is the first step in having a fast site, which also translates into more visits, which also translates into a better SEO, which finally translates into more sales.
There are a few hosting companies which we recommend:
- Cloudways (our recommendation) → After a decade of working with users from all over the globe and trying all kinds of hosting providers, we have found a company providing the best value in terms of performance and pricing. Starting just at $10 (it includes a free SSL certificate) you will have a highly performant service that will bring your website to a different level in speed terms, security, and fully supported. This is the company we use for all of our operative needs. We are recommending it because we found a high value and we want to share this with you as well. We know how frustrating to deal with hosting companies is, just start a hassle-free WordPress installation now.
- Kinsta → A very good and high quality option for your website. One of the best options in the market.
- Flywheel → Fully specialized on hosting optimized for WordPress websites.
- Media Temple → If you want a premium WordPress hosting which is easy to manage and works pretty well, this is a good choice to host your website on.
- SiteGround → During many years, this was one of the best choices and it still is. Even the smaller plans are working nicely for small projects.
Credits
And a special big THANK YOU for those great artists and creatives that provide us with some of their amazing pieces to illustrate Flamingo Portfolio Wordpress Theme.